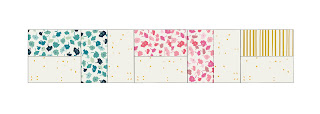
This is one of the easiest runner ever! The most complicated part I think is cutting, well not complicated, time consuming. This is a perfect piece for your living room or bedroom. I have mine on my living, beautifully displayed on my sofa. Have sewing this beauty! The directions are the easiest! Little new approach I'm tacking for easy projects, let me know if you like it ☺
Runner size: 20” x 60”
Fabric Quantities
ESS-II-252 ¼ yd - Fabric A
ESS-II-152 ¼ yd - Fabric B
ESS-II-355 ¼ yd - Fabric C
ESS-II-352 ¼ yd - Fabric D
ESS-II-155 ¼ yd - Fabric E
ESS-II-255 ¼ yd - Fabric F
ESS-II-354 ¼ yd - Fabric G
Cutting Instructions
Cut 2 (two) 2 ½” x WOF of Fabric A
- Then sub-cut into ten 4 ½” squares
- Then sub-cut into ten 4 ½” squares
- Then sub-cut into eleven 4 ½” squares
- Then sub-cut into thirteen 4 ½” squares
- Then sub-cut into fifteen 4 ½” squares
- Then sub-cut into sixteen 4 ½” squares
- Then sub-cut into eleven 4 ½” squares
Step 1
TIP: Have all of your cut pieces separated by fabric.
Now this is the fun part, start creating each row. All the the square sizes are the same, so there will be no error in placing the correct size with its respective square. So, use my TIP (explained above) for easier construction of each row (a design wall will be very useful for this project) Follow the images below for direction of fabric placement for each row
Once all of the rows are completed start attaching them together, use the diagram below for directions on design. Like I said before a design wall is a good thing to have, if you don't have one, the floor will do ☺
Didn't I say this table runner is the easiest! So fun and easy to do.
Happy sewing!
xoxo
Pat B.


Love this simple but effective piecing to achieve a zig zag, but the yardage is off on the material list for fabric G. No biggie, I can do the math, but fyi 😊
ReplyDeleteLovely blog yyou have
ReplyDelete