Showing posts with label quilt block. Show all posts

Tuesday, January 30, 2018

Quilt Block of the Month "Eight Hands Around"

Hello lovelies! 

January is almost over but I did not forget about our "Quilt Block of The Month". I am having so much fun creating new content in my YouTube Chanel as well as my blog, it is really fun and relaxing to make them. This time around, I decided to create an "Eight Hands Around Quilt Block" in Youtube and think it's one of my favorites so far. I want to show you how simple and fun it is! Just click on the picture below to watch how to make it:


how to quilt - quilt block - pat bravo

Did you like the "giveaway surprise" I have at the end of the video? Yaaayyy! Last month, I had some little technical issues with the software I use for the giveaways. But fear not everyone, this time around all you need to enter is to leave a comment in the comment section on the YouTube video after watching to enter and that's it! You can write about the video, the fabrics, or anything you want to tell me! Preview of the giveaway down below:

Giveaway closed:
Congratulations Linda Williamson, you are the lucky winner!


I will announce a winner next Monday!

Good luck everyone!

xoxo

Pat


Monday, November 20, 2017

Quilt Block of the Month "Double Aster"

Hello fabric lovers!

Lots of you have been asking me about the "Quilt Block of The Month" that I had to put on hold for the EPP Party. But fear not lovelies! The Quilt Block of The Month is making a comeback with an AMAZING giveaway! For this quick video tutorial, I decided to make the Double Aster block, click the image below for the video☺

https://www.youtube.com/edit?o=U&video_id=wHt5S1fHZB4


I wanted to used Indie Folk fabrics for this block because I believe the color and prints go perfectly well with the Double Aster block. Now, if you want to recreate this adorable block or just created something else in general, here it's a fun GIVEAWAY for all of you! 5 half yard bundles could be yours!


If you want to get your hands on these beauties which include, Indie Folk Fabrics, The Denim Studio by AGF and Pure Elements, complete the form below to enter. The winner will be announced next Monday at 12PM EST.
Good luck!

Enter Giveaway

Giveaway Closed, the winner is Ruth Newell. Congratulations!

* indicates required


xoxo

Pat B.


Monday, March 20, 2017

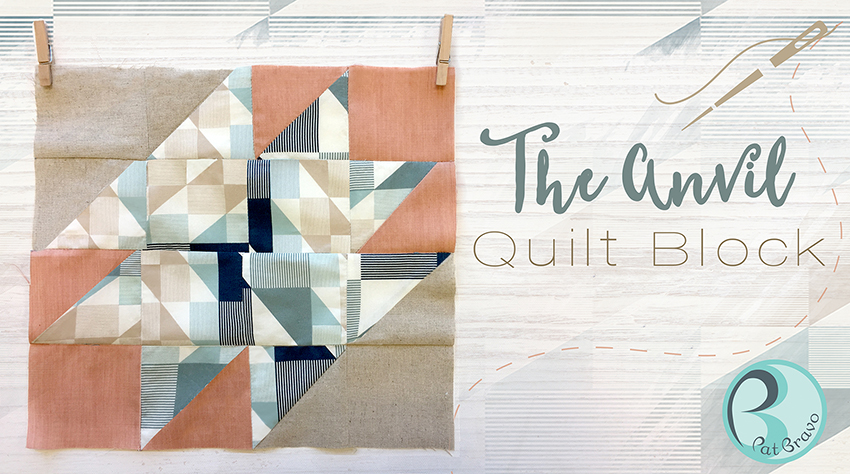
How to Quilt - Sew an Anvil Quilt Block - Quilting Tutorial

Hello makers!

Here's a little video tutorial for all of you! The How Sew an Anvil Quilt Block tutorial is up and ready for you to enjoy. This time around I made an easy to follow Quilt Block because I have been noticing a tremendous gain of new followers that are beginner quilters and I think this step by step tutorial can help them in their quilt block making process. 
For this block, I decided to incorporate The Denim Studio by AGF, I think the chosen colors are match perfectly with Trekant Rows Breeze, don't you think? 

https://www.youtube.com/watch?v=-F3pVe8vc7w

Click on the image above to be redirected to the video. The fabric quantities and details are explained on the video☺

Happy sewing! 


xoxo

Pat B.

Thursday, June 11, 2015

Same Block, Different Looks

Hello lovelies!

A while ago I made a blog post for AGF called, One Block Three Ways and I wanted to do it again on my blog. I wanted to show the different ways one single quilt block can have with different fabric selections. Sometimes we just get stuck in one style and we forget that we can mixed and match with different fabrics, and have a stunning result. 
This time around I made two Pinwheel quilt blocks (being one of the easiest to make because it only involves half square triangles!), giving them two different looks, Ethnic and Romantic.

Ethnic

For Ethnic, I used Etno Fabrics'  Dreams of Amina, Shore Remains Algae and Macchiato Pure Elements from Art Gallery Fabrics. If you wan to go for a more Ethnic look on your quilt, make sure to choose light and dark pure colors that will complement the main fabric which you had selected for central focus.   


I like to get inspired in everything I do and visualizing my inspiration is a must, so I created this little mood board with inspirational images that will help me get inspired and I hope it helps you as well☺


Here is a close up of the Ethnic quilt block. See how the soft Mocchiato perfectly complements Dreams of Amina and Shore Remain Algae, it truly makes this block stand out.


Romantic

For Romantic I used Rock 'n Romance. I wanted to give romance an edge with a bit of Rock n' Roll and what a great way to do so than with Rock 'n Romance.
For this block I used Wild Heart Spirited, Femme Metale Steel and Art Gallery Fabrics' Verve Violet. Romance is all about sweetness and softness, but with the bit of Rock 'n Roll I added to it, I had to add a strong yet soft background color and AGF's Verve Violet was the way to go choice. 

And here is some of my inspirational pictures to help me get inspired when choosing colors ☺


A close up of this Romantic quilt block. The fun part about it is that this block does not look the same while using different fabrics. You will have two completely different quilts using the same quilt block! How cool is that??  


I wanted to prove my point by using a traditional quilt block. If you choose your fabric carefully and have in mind what sort of quilt you want to achieve (Ethnic, Romantic, Modern...etc) you can make something amazing and can turn this traditional block in a very stylish one ☺


xoxo

Pat.

Friday, December 6, 2013

Aurifil Block of the Month with Rock 'n Romance

Hello everyone! I just can't believe that it's December and the very last Aurifil Rock 'n Romance quilt block has been sewn.

Here are the last four blocks of the year!


If you missed it, here is the 1st group of blocks and the 2nd group. All 12 blocks are just amazing! Thank you 2013 Auriful Design team for your gifted sewing talents and making wonderful blocks with Rock 'n Romance. I cannot wait to see the finished quilt! For a sneak peek of the quilt, go to the AURIbuzz blog to see that layout, by Pat Sloan.


You can also stop by the AURIbuzz blog to to read the lovely interview Pat Sloan did about me :)


Also, you have until Monday to enter my Rapture fat quarter bundle giveaway. Good luck!

Happy sewing and have a great weekend :)

Monday, August 5, 2013

Aurifil Block of the Month with Rock 'n Romance

Hey everyone!

I'm am so honored and excited that my fabric line, Rock 'n Romance, is being used for the 2013 Aurifil Design Team! Twelve lovely designers are creating awesome blocks. Each month there will be a new quilt block by one of the designers. I already shared with you the first four designers in a previous blog post. Now here are designers five through eight!


Designers 5-8 are:

Each block is unique and they are all so great! There are four designers left. I can't wait until December to see all of the blocks!

Happy sewing!

Love,

Wednesday, April 24, 2013

FREE PROJECT : Quilt as You Go

Hello! It's Hump Day. And there is nothing better to get you through Wednesday than a free quilting project! 

I wanted to take the opportunity to show you a technique on how to attach blocks that have already been individually quilted.


Here's what you'll need:
  • Ten (10) 9¼" x 9¼" quilted blocks
  • One (1) 1¼" x WOF strip of choice of fabric (in this case I used Pure Elements White Linen)
  • Four (4) 1¼" x 19½" strip of same fabric chosen
  • For Binding: Three (3) 1½" x WOF strips of fabric chosen (for further instructions on Binding, go here)

The first thing, if you have not already done so, is to trim the excess batting that you have after quilting and to square your blocks so that they measure, in this case, 9¼" x 9¼".


Once they are ready to be sewn, display them on the wall to see what arrangement you like best.


Now you can start to construct the rows individually. It is important that you sew them WRONG side to WRONG side with a ¼" seam allowance. Yes, you read correctly! That is the first part of the trick here!


Press seams open after sewing. You will have at least three layers to press, so press carefully.


Now attach the two rows together, WRONG side to WRONG side again. If you you find that the intersections are too bulky and it's creating difficulty with your machine. You can CAREFULLY trim down the batting around those areas with the scissors.


Press the seam open.


Grab all the 1¼" x WOF strips and fold in. Press ¼" on each of the long sides of the each strip.


In this tutorial, what I'm going to show you is a different way to do sashing in "applique" style in order to cover unfinished seams and also bring more design and visual interest to your piece. As far as color for the thread, you can choose to use matching color thread for the top fabric.

First, attach the longer strip right on and center it with the seam that attaches the two rows. Pin as needed and top-stitch 1/16" away from the edge of the strip of both sides. Press.


Once you finish that strip, you can proceed to sew on the strips that go on top of the "vertical" seams, following the same process as the horizontal strip.


After you have finished pressing, use a rotary cutter and ruler to trim the excess sashing.


Now you are ready to bind it! If you have a preferred way of binding your quilt, go for it. In this case, I used the same technique I usually do on my Free Quilt Patterns.

Pretty simple, huh? This is an easy way to make a modern and colorful quilt. The decorative stitches add a nice and different touch to a solid fabric.

Happy Wednesday!
Pat

Thursday, April 4, 2013

Aurifil Block of the Month with Rock 'n Romance

Hey everyone! I'm am so honored and excited that my fabric line, Rock 'n Romance, is being used for the 2013 Aurifil Design Team! Twelve lovely designers are creating awesome blocks. Each month there will be a new quilt block by one of the designers. Here are the first four of the year.


The 1st four designers are:

The blocks are all so great! I'm so inspired that I'm already sketching out my design for December. I can't wait to see more!

Happy sewing!
Love, Pat

Monday, January 28, 2013

Using Decorative Stitches in Modern Quilting Pt. 3

Happy Monday my loves! First of all, I would like to thank you all from the bottom of my heart for all the wonderful comments you made about my Bernina dream coming true! I can truly say that you are all the absolute best and I'm happy I was able to share that special moment in my life with you.

Now, I know it's been a while since I've written. As you can see, I've started my own little color inspirations to add a bit of brightness to your day with love from me. So today, I'm going to continue my four part tutorial on how to use decorative stitches in modern quilting and hide your stitches by hand. We've already explored how to create an intriguing quilt block by using solids and explored the many decorative stitches out there that can give your quilt a different look.

So let's begin...
The Blanket Stitch on this block creates a visual interest that is both daring and modern. Its linear structure appeals to the absolute modernist some quilters have inside.
Taking the last block further, I chose to use the Double Blanket Stitch, but this time I placed it on a completely new palette of Pure Elements to demonstrate how simple alterations to an idea can create a whole different mood on a quilting block.
I call this our Variation Fancy X- Hemstitch. The combination of what is considered a traditional stitch plus the modernity of the colors chosen for this block make it the perfect match between classic and contemporary.
Last but not least, in order to add a sweeter touch for all the hopeless romantics out there, I decided to create a what-other-than pink block with the Blanket X-Cross Stitch. Did you notice how all the X’s symbolize kisses? The combination of the traditional straight stitch with the “x-kisses” carries the modern element while keeping the essence of this quilt close to the heart.

Now that all the blocks are done, I will demonstrate how to hide those loose threads for a crisp finish on your blocks:


For this, you will need a hand-sewing needle:
  1. Grab the loose end and thread the hand-sewing needle with it.
  2. Pass the threaded needle through the last whole that was created when making the decorative stitch with the machine needle, making sure NOT to go through the batting but rather assuring to hide the thread in between the fabric and the batting. This applies for both the front of the block and the backing.
  3. Pull gently to obtain a smooth surface and voila! Trick accomplished.
  4. Hopefully you loved this post and I was able to open a little window of love from you toward the sometimes forgotten buttons on your machine. Experimenting with combinations of different fabrics and different stitches can immerse you in a whole new world of quilting, where the rules and styles are created as you go. 
Enjoy and explore!

Love,
Pat
10