Showing posts with label color. Show all posts

Thursday, January 22, 2015

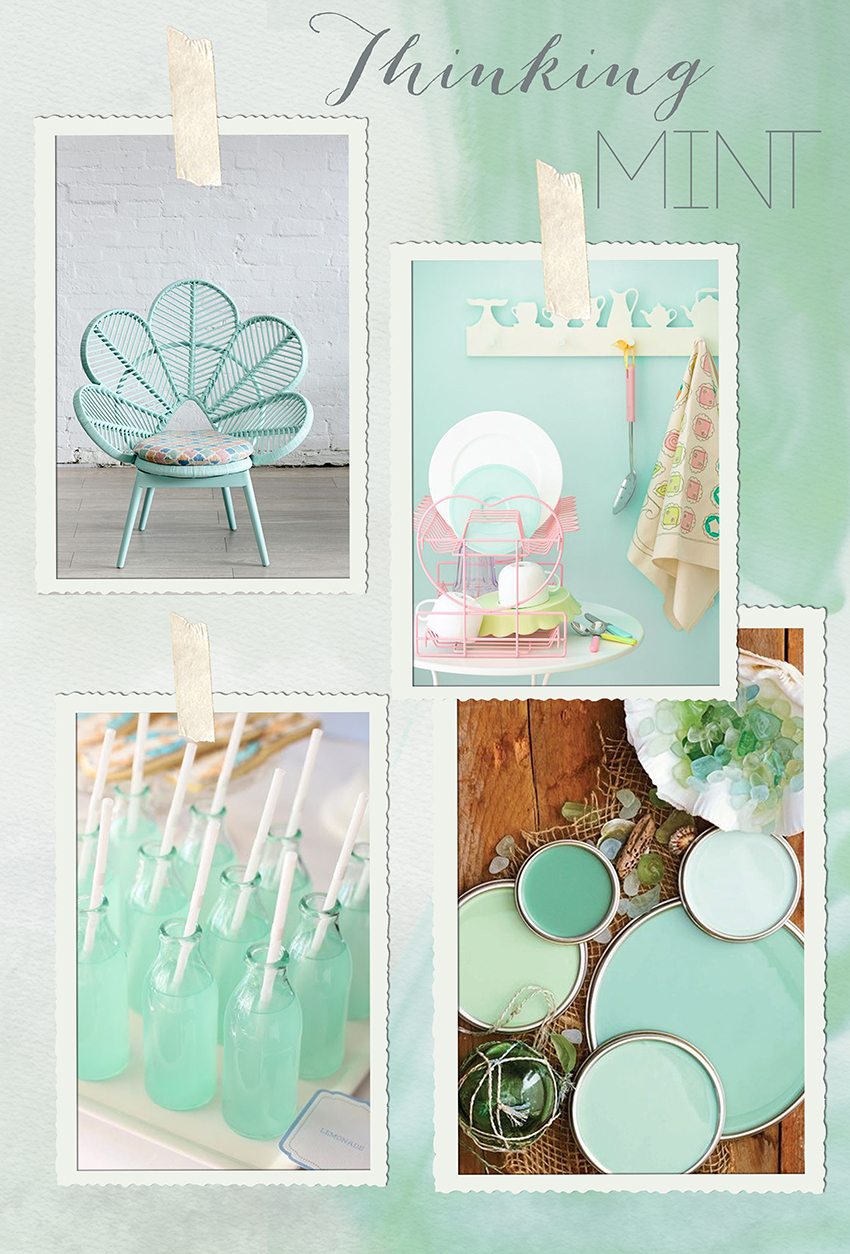
Thinking Mint


Hey lovelies! 

I want to share with you my current color obsession! I know that I had blogged about my latest color inspiration-which I absolutely adore...those pink hues..I mean really! Love it!!- but I just couldn't ignore this color which I had been spotting everywhere. I am constantly finding inspiration and specially in colors. Soft and multicolored hues are as essential as mood boards. A mood board stimulate my senses with textures and images while colors give me the spark to create something new and exciting. Well.....lets get to it, currently I am thinking about Mint or as PANTONE calls it, Lucite Green.  This color is a part of Spring 2015 color trend along with more stunning tones full of cooler, softer and warmer hues. Although, Mint or Lucite Green is not considered a fashion color, it does come back form time to time.   


Mint is a perfect Spring color, but living in South Florida, I have the chance of sporting this hue all year round. I am super thrilled and excited about Spring 2015 color trends! There is a great variety in tones...no worries, I will be blogging about them soon   
xoxo, 

Pat

Wednesday, October 9, 2013

books that inspire : COLOR

Hello lovelies!

I've been super duper busy preparing for Quilt Market in a few weeks. There are so many things that need to be done! I hope you've been following me on Instagram to get a sneak peek of all of the projects that I've been working on. I've been so wrapped up into quilting and painting that I've haven't been on social media much. But I wanted to do a blog post today!

Everybody knows that I love color! Color inspires me to design. There are many great books on color theory and you can refer to them any time!


Here are some color books that I shared at Sewing Summit. I consider them to be the best of the best when it comes to looking for a color palette for your new collection!

The Color Scheme Bible
COLOR SCHEME BIBLE
This in my opinion is the best book for color stories available. It is divided by a single color, which, in its own category, is divided by shades. For each color scheme you have a selection eight colors and they already come named to further inspiration.

Neutral Color Schemes
NEUTRAL COLOR SCHEME
This book is the same as the Color Scheme Bible, except it focuses on neutral color schemes and involves less colors.

COLOR YOUR HOME
Each color in this is schemed by temperature: blue-vivid, blue-earthy, blue-rich, and so on. The color groups are small with only three in a group. It's a great color starter, but you may have to add in some other colors.

COLOR HARMONY
This is a great book that has a special section on trends. Color groups are visualized by moods. For example, you will find powerful, rich, romantic, vital, mellow. Each mood is subdivided by harmonies, complementary, etc.

Although each book is for home interiors, they are great sources of color inspiration for any aspect of design or otherwise. These are my go-to books when I'm looking for those interesting color combinations and just need to get that color motivation going. I don't get tired looking at these books!

Happy reading!

Monday, September 23, 2013

Sewing Summit Recap

Hello lovelies!

I'm back from Sewing Summit and all I can say is that I miss it already! It was truly one of the most memorable experiences I have ever had, having taken part in this wonderful gathering of sewers and quilters alike. I had the pleasure of meeting some wonderful people and getting to know them was definitely the highlight of this event!

Here's a little recap of all the special moments I shared.

I was so honored to teach my class on fabric design named "Designing Fabrics from the Heart." I had 80 students attend! Can you believe it? I was so thrilled that they all came to see me, I could not hold back how happy I was.

Sewing Summit 2013, classes

I was beyond ecstatic to find out that many of my students were inspired and enjoyed at all the information I had to give, that they even shared their moments in my class with the rest of the world! Many people took away my quote, "To be creative is to let little pieces of your heart go and place them into each project you make."

Designing Fabrics from the Heart

I was also happy to see that everyone enjoyed their handouts and fabric samples. Great pics everyone! Can't wait to see what you all do with those goodies.

Sewing Summit 2013, friends

It was also great to see old faces and finally meet online friends in person! It's events like these that truly let you connect with all the great friends you have around the world!

Sewing Summit 2013, sewing

And finally, the BERNINA sewing room was AMAZING! It was open until 1 a.m. every night with two rooms that had the 780s (the same baby I have at home) and the 350s! Sewing at night with such wonderful and creative people was a great experience, one that I will truly treasure.

And not only did I teach a class, but I was able to take some as well. English Paper Piecing taught by Kaye Prince (Miss Print) was a fun and easy class that taught you the basics on how to get started. I learned a lot of interesting things with Ellen March's (Sew It All TV) Getting Published in a Magazine. And Jeni Baker's (In Color Order) HTML Basics for Bloggers was definitely chockfull of information on how to code and design your heart away on your very own blog.

Now, for a little tidbit of what I taught, I'll leave you with a few rules that I feel are important when it comes to fabric design!
  1. You have to design following your heart!
  2. You have to love the colors you work with!
  3. You have to deliver each & every time!
  4. It takes time, so be patient!
  5. Always know the audience you are designing for!
I hope you all enjoyed my Sewing Summit recap and that you all had a great weekend! Tomorrow I'll have a special BERNINA sewing machine tip. And on Thursday, I will be sharing some more What I'm Loving Right Now, so stay tuned for that. :)

XO,

Tuesday, September 17, 2013

I'm Speaking at Sewing Summit 2013

Tomorrow I'm heading to Salt Lake City for a modern blogging and sewing conference called Sewing Summit! It's a cross between a traditional sewing retreat and a social media or blogging conference and it's been sold out for weeks! This will be my very first time attending and speaking! I'm so excited!

Sewing Summit 2013

My class will be a fabric design class called "Designing Fabrics From the Heart." I've put a lot of my heart and soul into this class! I want the Sewing Summit audience to learn the basics on how to get started designing a fabric collection. I know how hard it is to be a textile designer. In the beginning no one wanted to give me a chance. I'm grateful to be where I am today and I want to be able to share and give back.

Designing Fabrics from the Heart

I want everyone to discover the designer within them by learning how to gather inspiration from the world around them, and learn how to put together the things they love to create a story board for a fabric collection.

I love color! So I'll be teaching how to cultivate color stories and how to relate them to a concept for a fabric collection. I'll also be teaching how to analyze designs to make a balanced fabric collection. Furthermore, I'll be sharing all the software necessary to make stunning designs and the  basics of different pattern repeat modes as well as recoloring methods!

Here is a sneak peak of my presentation! The audience's mind is going to be blown away with all of the images and information that I have to share!

WOW, that's not even the whole presentation! I really hope that I can fit everything into my 75 minute class. My message to every aspiring designer is:

"To be creative is to let little pieces of your heart go & place them into each project you make." - Pat Bravo

I'll be away from the blog for the rest of the week. So be sure that you follow me on my Instagram for all of the Sewing Summit action. I'll be back later next week with a recap!

Are you a blogger attending Sewing Summit this weekend? If so, give me a shout. I’d love to meet you!

Later Loves, xoxo,

Tuesday, August 20, 2013

Where I Sew

Hello friends!

I hope you have all had a wonderful weekend, crafting and catching up on all sorts of projects! I've been working on some new tutorials and projects for you that I will be sharing within the upcoming month. So don't forget to check back within the next week and see what I have in store for you!

Today's post is very special to me because today I will be showing you one of my most treasured spaces: Where I Sew!


I have been so fortunate as to have a little section of the house to myself. Not only do I have a sewing room where I make my projects, but I also have a connecting room, my studio, where I design my fabric collections and have all sorts of inspiration surrounding me.

When we first moved in, my studio used to be the "library", where my son Alex had all his gaming systems set up and the walls were lined with bookcases. It was sort of a living room, that really wasn't a living room, but it was! Then it became my workspace, where I had only my computer desk, a beige couch, and a vintage rug for decoration. From there, I started to add my own style to it and Voila! I now have my studio and sewing room.

As most of you know, I love collecting vintage furniture, so you can be sure of it that my sewing room and studio have quite a few vintage finds, combined with some modern furniture pieces that I have. I can't get enough of mixing the modern with traditional!


Most of you know that I'm a history fanatic, so of course I had to pay homage to one of my favorite historical figures, Marie Antoinette. I have her portrait in one section of my studio, with a set of striped-floral pillows that I made. I have to say, these are one of my favorite projects that I've done so far!

I LOVE COLOR, so it has be present everywhere I work! Accents of color are a great way to liven up your home and add a touch of brightness and happiness to any room. I've painted picture frames, collected colorful vases, and bought decorated tea sets that all have something to bring into my decor.


Ah, here is my sewing room! Yes, I know it's a bit organized, but that's for photographic purposes. Did you really think I would take a picture of all the mess that I have lying around? Besides, I had to clean up someday and I thought that taking these pictures would give me a good enough reason to do so.

You can find all sorts of inspiration for your spaces on Pinterest. One of my favorite pictures is that of the thread being framed on the wall. I had to do it for myself because the idea seemed so wonderful to me!


Even though it may not be organized 364 days out of the year, I love to try to keep things in an orderly fashion. I have all my fabric bolts, interfacing and batting rolls, as well as my threads, in this nice wooden shelving unit I got from Ikea some time ago. It's proved quite helpful, showcasing wonderfully what I have that way I can grab things and go (which is probably why it might get messy sometimes)!

So, thank you for stopping by! I hope you enjoyed reading as much as I enjoyed sharing it with you. Hopefully this inspires you to add some color into your life and not to be afraid to add your own style into your working space!

Until next time, my lovelies!

XO,

Monday, May 6, 2013

Designing Fabrics from the Heart

Hello everyone! Hope you had a great Cinco de Mayo weekend!

I've been preparing my Carnaby Street booth for Quilt Market. It's turning out to be a 60s mod blast to the past! And... I've been working on my speech for Schoolhouse!


I'll be speaking on Designing Fabrics from the Heart. I'm so passionate about fabric and color. I can't wait to share my affair with color and creative process on how I design my fabrics!


I'll see you there :)
Pat

Wednesday, April 24, 2013

FREE PROJECT : Quilt as You Go

Hello! It's Hump Day. And there is nothing better to get you through Wednesday than a free quilting project! 

I wanted to take the opportunity to show you a technique on how to attach blocks that have already been individually quilted.


Here's what you'll need:
  • Ten (10) 9¼" x 9¼" quilted blocks
  • One (1) 1¼" x WOF strip of choice of fabric (in this case I used Pure Elements White Linen)
  • Four (4) 1¼" x 19½" strip of same fabric chosen
  • For Binding: Three (3) 1½" x WOF strips of fabric chosen (for further instructions on Binding, go here)

The first thing, if you have not already done so, is to trim the excess batting that you have after quilting and to square your blocks so that they measure, in this case, 9¼" x 9¼".


Once they are ready to be sewn, display them on the wall to see what arrangement you like best.


Now you can start to construct the rows individually. It is important that you sew them WRONG side to WRONG side with a ¼" seam allowance. Yes, you read correctly! That is the first part of the trick here!


Press seams open after sewing. You will have at least three layers to press, so press carefully.


Now attach the two rows together, WRONG side to WRONG side again. If you you find that the intersections are too bulky and it's creating difficulty with your machine. You can CAREFULLY trim down the batting around those areas with the scissors.


Press the seam open.


Grab all the 1¼" x WOF strips and fold in. Press ¼" on each of the long sides of the each strip.


In this tutorial, what I'm going to show you is a different way to do sashing in "applique" style in order to cover unfinished seams and also bring more design and visual interest to your piece. As far as color for the thread, you can choose to use matching color thread for the top fabric.

First, attach the longer strip right on and center it with the seam that attaches the two rows. Pin as needed and top-stitch 1/16" away from the edge of the strip of both sides. Press.


Once you finish that strip, you can proceed to sew on the strips that go on top of the "vertical" seams, following the same process as the horizontal strip.


After you have finished pressing, use a rotary cutter and ruler to trim the excess sashing.


Now you are ready to bind it! If you have a preferred way of binding your quilt, go for it. In this case, I used the same technique I usually do on my Free Quilt Patterns.

Pretty simple, huh? This is an easy way to make a modern and colorful quilt. The decorative stitches add a nice and different touch to a solid fabric.

Happy Wednesday!
Pat
10